Tuesday, January 29, 2013

Show me the Numbers!

Continuing the theme of late blogging here's some more '02 work done earlier this month.

AEM A/F Ratio analog gauge powering up

Not having convenient access to a chassis dyno anymore - they all seem to go out of business - I want some hard data on tuning my car. The car has a pair of big DCOE 45 Weber carbs and running the numbers all my jets, chokes and venturis are probably in the ballpark. And the car is seemingly running well, but how do you really know without numbers or a baseline? Tuning Webers can be an art but I already have a day job and too many hobbies, I don't need an apprenticeship taking several years. I'd rather be driving, racing or drinking beer.

Being a typical American with a short attention span, I want a quicker way to motoring bliss. So I bought an AEM Air/Fuel ratio gauge to help me dial in the motor. They make a nice analog version which complements my vintage style VDO gauges so it doesn't look too out of place. With this I can fiddle with timing, jets and throttle applications and get the numbers. As while your seat of the pants will lie to you, the numbers don't.

I swapped out my existing clock and shuffled the other gauges around. When I'm driving the bimmer I don't really care what time it is. I'm keeping the Oil Pressure and Temps, and the Voltmeter.

First step is wiring it up.

Gauges rat's nest of wiring

And in a nice gesture to my future senility and/or the next owner, I tagged the wires with their function.


Meanwhile, I took the header to my local muffler shop - Midway Muffler in Elsmere. They work on my racecar exhaust system and are good guys. For $20 they welded a bung to the header for the O2 sensor.


Unfortunately, all the work I did earlier in the year to the header - de-rusting it, painting it with satin black high temp paint - came to naught. Every time I start the car I have to endure a couple of minutes of smoke coming from the headers as they cook off the paint. Plus they are beginning to rust again.


But as usual, I have a plan. They'll be taking a journey down to Crazy Coatings in Middletown, where they'll get bead blasted, and ceramic coated. I'm expecting it to be $250 or less. Take That Rust! Going No Mercy on your ass. Pics when done.


Monday, January 28, 2013

Studs

An ongoing bit has been sorting the suspension of the 2002. The major part so far is the tire and wheels combo. The car as bought came with 13 inch BMW turbine wheels from an E30 with little tiny tires ('quality' US General tires). Try finding decent tires in 13 inches these days, it's slim pickings out there.

Anyway, I wanted something better looking and really liked the look of Minilites/Panasports. They had a nice vintage racy appeal. I ended up buying a set of Rota RB's in gunmetal in 15 inches. They're a popular wheel from Spain with the Minilite look. 15 inches will give me a much greater selection of modern tires.

Rota RB's with Kumho AST performance tires.
Complicating matters is the car isn't what you would call stock. With the turbo flares mounted, I'm not restricted to the original mounting and offsets. In fact, if I mounted stock wheels on the car it would look pretty funny, like a clown car, as they wouldn't come close to filling out the flares. And there isn't any guide where I can just go lookup what size wheel I need. I need to measure, fiddle, fuss and guess, and repeat.

After thinking about it for several months, I pulled the trigger and bought the above wheels. They look great and fill out those wheel arches.

Before the repaint


Problem is, they rub.

They rub in front, and they rub in back. Now reading the forums, this is liking saying 'hey, the sky is blue'. They all do that with 15 inch tires. The common consensus here is a BFH is your friend. Find out where it's rubbing - use some spray paint as a marker and go for a spirited ride - and then "adjust" the wheel well.

So I been doing a little of that, plus playing with spacers, plus playing with the size of the tires. My local tire guy loves me. At this point I'm getting a volume discount on tire changes. I'm closing in on my perfect tire/wheel/spacer combo but the snow and salted roads are upon us so the research program is on hold.

But while doing my 'research' aka hooning on the local roads, I started worrying about the engagement of my studs and wheel nuts.The wheels have deep socket wells and I'm using spacers so it's hard to gauge how much stud the lug nuts are clamping down on. I decided I would feel better with longer wheel studs. Off to the internet and Ireland Engineering's web page.

A week or two later and I have a set of new studs and lug nuts.


original stud on left, new one on right


Since the new studs are a bit longer than the original, I couldn't finesse the installation and needed to pull the rear hub.

Pulling the hub with my handy dandy Harbor Freight puller

Using my vise I pounded out the originals with a hammer and with a socket wrench pulled the new ones in.


Of course, we all know the color red makes everything go faster, so I painted the rusty drums with Rustoleum red.


Back on the car ...


The end result.


Yup, safer, subtle and faster. Just the way I want it.

Sunday, January 27, 2013

Onward into 2013 - 944 update

Welcome readers, all 3 of you, to 2013. While I have been lax with my updates, that's not because I haven't been busy in the garage.

With the '02 driveable - but not finished, I've been running about town and adding to my tick list of things to do which I'm sure will show up here in the future - I've turned my attention to the 944 race car. While the first race is in May, as usual, I have a long list of things planned. New rear rotors went on the car and then after a through inspection I turned my attention to the front.

My major oil leak I had been battling most of last year was identified as 2 sources: a upper balance shaft front seal and a cam tower gasket seal.

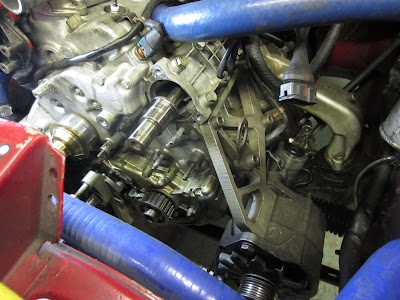
Naked Upper Balance Shaft - happy to see someone


As the balance shaft hides behind the belt covers, pretty much the whole front of the engine needs to come off. A couple of nights of labor and it was all back together. Another night for the camtower seal and I was done.

Home of Click & Clack - the Tappet Brothers

After bringing the car up to temp and bleeding the coolant lines (and smoking out the garage from the oil spilled on the headers), my major leak was gone (Yayyy!) but I still had a slow leak from somewhere else (Boooo...) It wasn't the camtower gasket.  I ordered a fluorescent dye kit from Amazon and I'll give it a go when that shows up. Let's keep going.

While a year late, its time for Project Turbo Nose.

I had bought a fiberglass turbo nose a year and half ago with the intention of mounting it last winter. Well the motor rebuild last winter turned to be more time consuming than planned, so much for that idea. I probably wouldn't have finished it anyway, as it turned out I also needed a turbo nose panel, headlight covers and fenders to make a go of it. I scored those bits at the Hershey Swap meet last spring and they have been slumbering in my attic ever since. Their time has come.

First up is removal of the old, banged up bits.


Next it was time for some test fitting of the turbo panels.

MX Blaster tool used to remove the decals
With the panels vaguely fitted, I did a quick sand and prime.


Looking good so far.

The next step to get ready is to make sure the car is straight. Over the last several years the car and driver have been attending the School of Hard Knocks. Notice in the picture above the 2x4 under the front left wheel. Without it I can't get my lift arm under the car, while the other arms fit with no problem. So I'm hauling the 44 up to Bodymotion in North Central New Jersey to have them put it up on their frame bench and apply some auto yoga to it. Gotta get my chakra in tune you know. While it's there, I'm going to have them hang the fiberglass front spoiler for me. I figure as a race shop their welding just might be a little better than mine. I'll do the sanding and painting when it comes back, plus relocate the oil cooler and other bits.

With it and the trailer gone for a couple of weeks, time to work on the '02 again. With winter finally here and salt being put down on the roads, the little bimmer is on vacation back in the garage. And I still have plenty to do.

My (Premature) Obiturary

Lots of news organizations maintain pre-written obits so that when a celebrity passes, they open up the file and need to just update a few l...