Sunday, February 19, 2012

moto time


With the tranny now happy, it was time to working on the inline 4. I plan on cleaning and painting everything, replace most seals and gaskets, and do the rod bearings. As I get into it we'll see if anything else pops out.

Over the last couple of weeks I've been stripping the block of various bits and rehabbing and replacing those as I go. Now I'm down to just the main block. After cleaning, wire brushing and prepping, I applied a layer of Eastwood's ceramic motor paint to the main block. Since the car is at the body shop I can tell you that the color is actually Ford Blue, but you didn't hear that from me. And if you ask me when it's stuffed into the car I'll tell you it's an OEM BMW color. I swear officer!


I applied it with a foam brush and I'm happy with how it came out. It flowed very nicely and has a nice finish. Looks better than the silver I used on the 944 motors.

Once the main block was done, I moved on to more tasks. I pulled the rocker cover to take a look.


A closer view shows a little hottie, a Schrick 292 cam to help digest all that gas from the DCOE 45 Webers.


Started pulling the timing chain covers on the front of the motor. They'll be cleaned and repainted, and reattached with new gaskets.


Both covers now off. A friend of mine who works on American Iron remarked" "That's a long timing chain!". There's a 2nd chain on the pulley at the bottom going to the oil pump.


And of course, the timing covers headed over to the Alpine Garage's state of the art, paint booth.


But enough of that artsy cosmetic stuff, we want to see moto guts. Lets rip off the sump pan and get exposed.

Is that a con rod in your cylinder, or are you just happy to see me?


Luckily this is a 18 or older blog, as it's all in the open now.


New rod bearings - or as the British say, Big End Bearings - for the lady lump. Before moving on though, I first measured each bearing's clearance to make sure it was within spec. I used a tool called PlasticGage. A very thin wire made out of plastic. You put a small piece on the crank, add the bearing and torque to spec. This squishes the thin piece of plastic. Remove the con rod shell and bearing and then measure the width of the flattened plastic using the scale on the side of the PlasticGage. This tells you the bearing clearance. All rods were with spec.

You can see the green smushed line on the crank

And my favorite part of the weekend was torquing down the connecting rod bolts. Why you say?  Because I got to use my brand new Snap-on electronic torque wrench. What an awesome tool! Dialup the torque (in ft/lbs, newton/meters, etc) and have your way with that bolt. When you reach the spec, it vibrates in your hands and sounds an tone. It also tells you exactly what the final torque spec was. Too cool, it excited my inner tool geek. And just like when I got my first GPS and it told me exactly, when I wanted, how much further it was to my destination, you can watch the torque being applied in real time. Awesome! What can I say, I'm a cheap date ...

Tool porn

Sunday, February 12, 2012

Bimmer Tranny's done

Transmission drain plug with center magnet

So that's where my 2nd gear synchro's have all gone. Ground to little fine metallic bits to be captured by the magnet center of the drain plug. This seems like a case of Deja-vu all over again.

Now where have I seen that before? ....  Oh yeah,

944 motor after the Glen in 2011

This was the motor drain plug after the #2 rod bearing let go in my 944 race motor last year. I hope it's not a car virus. Car viruses are not supposed to jump species, like from a Porsche to a BMW. Well to just make sure, I think I'll sacrifice a beer or two to appease the car gods.


Meanwhile, you have seen the condition of the tranny as it was pulled before.

It's that greasy lump hanging on the back of the motor

Somewhat cleaned up but still full of rusty bits. The spongy tranny mount is hiding in the  right bottom.


Since then, it's been considerably cleaned up, repainted and refreshed with a new quart of Redline MTL. The original tranny mount was soft and soggy and replaced by a new Ireland Engineering urethane one. When reassembling everything I discovered that a pair of bushings that center the shifter had been missing. They're now on order and when installed it should take out a lot of slop in the shifting.


Looking good. Onto the motor.

Tuesday, February 7, 2012

Paint shop update

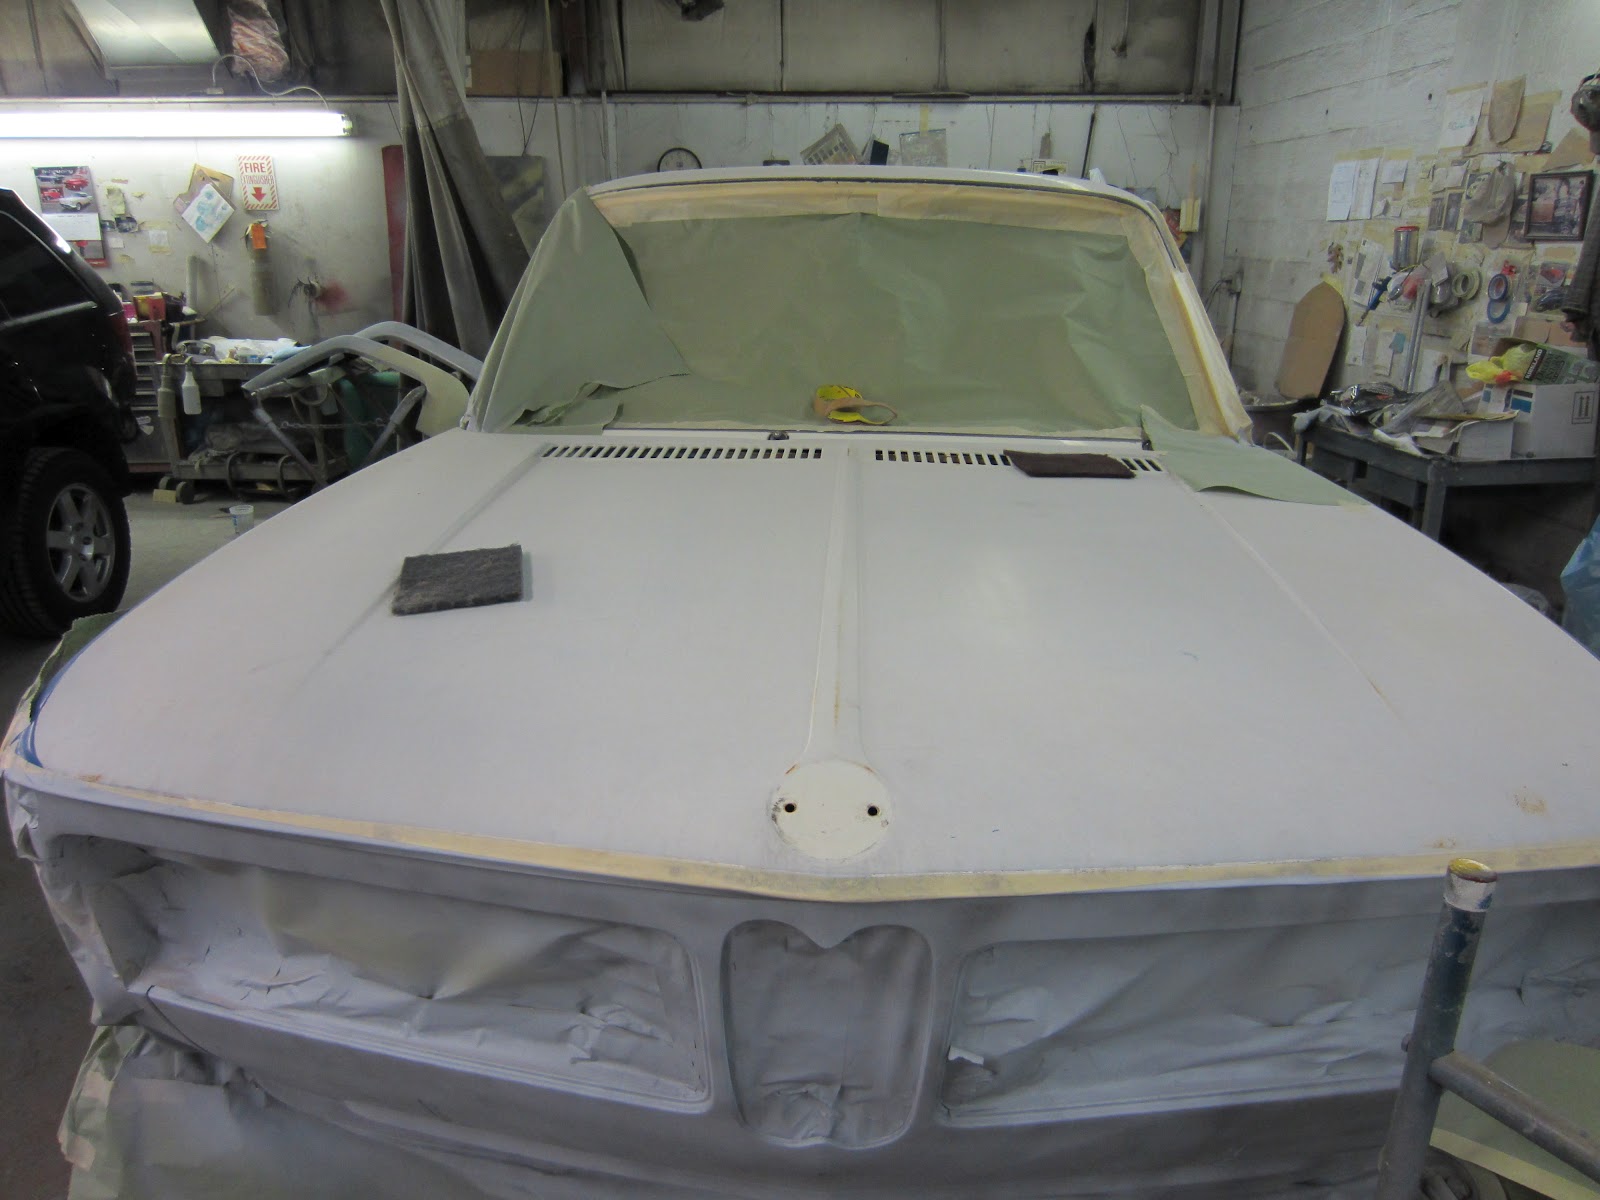
I visited my car tonight to see it's progress. All major body work has been done. Just a few more holes need to be welded shut. The hood and trunk lid need to be sanded down, and then it's headed for the paint booth.

Surprisingly, very little rust was found. As they kept telling me at the shop, "The car is clean, top and bottom". All the normal spots you expect, like the areas under the windshield and rear window trim were clean as a whistle. The only places they found bad were the bottom drivers door, and a spot under the rear spoiler. That wasn't surprising, as the spoiler wasn't bolted down as normal, but somebody in the past glued it to the trunk lid, allowing it to trap moisture.

Here's some pics.


Lower trim removed and holes welded shut and sanded

trunk lid sanded down to bare metal where the glued spoiler was located


Rear trunk panel pulled out. It was almost 1.5 inches pushed in at the top, from many years of folks leaning over and into the trunk. Now the trunk latches easily.


Patch welded in corner where one of the US federalized light/markers was removed
.
When they cleaned and degreased the car, they lost all of the notes I had written on the car. Here he's making a note to fill the mirror holes.

Monday, February 6, 2012

A pile o' parts

My office is getting crowded with the pile of cleaned/refurbed parts. Header, radiator, intake manifolds, water pump pulley, tranny supports, weber carbs and linkage, alternator brackets and more. With the endless hours of stripping, polishing, wire brushing, painting, it's easy to feel like I'm not making much progress. But when I look at this pile o' parts, I go "yeah baby, looking good."


Sunday, February 5, 2012

Another weekend, another 10,000 braincells lost

Both cars are still gone, the racecar at Behe's, and the '02 at Northeast. But that doesn't mean it's time to get fat and lazy. Oh no, still plenty of work to keep me busy. This weekend was all bimmer restoration work, but a variety of tasks.

I started off with more work on the transmission. This is all "pretty" work, making it look good. I'm not going to do anything to the internals, even though the 2nd gear synchro's are shot - a common 2002 failure. I'm going to throw some new Redline MTL in to the box and call it a day. Task #1 in this restoration is "Avoid Mission Creep!" 

It's all too easy to say, Hey, since we're here, let's replace "xxx". Not going there.... Well, maybe a little bit. I did buy a new water pump, it was only $70. And if you are going to replace it, might as be now when you're stripping the engine block. And a new starter, and a new fan blade, and a .... Stop! Must refocus. Oh yeah, the tranny.


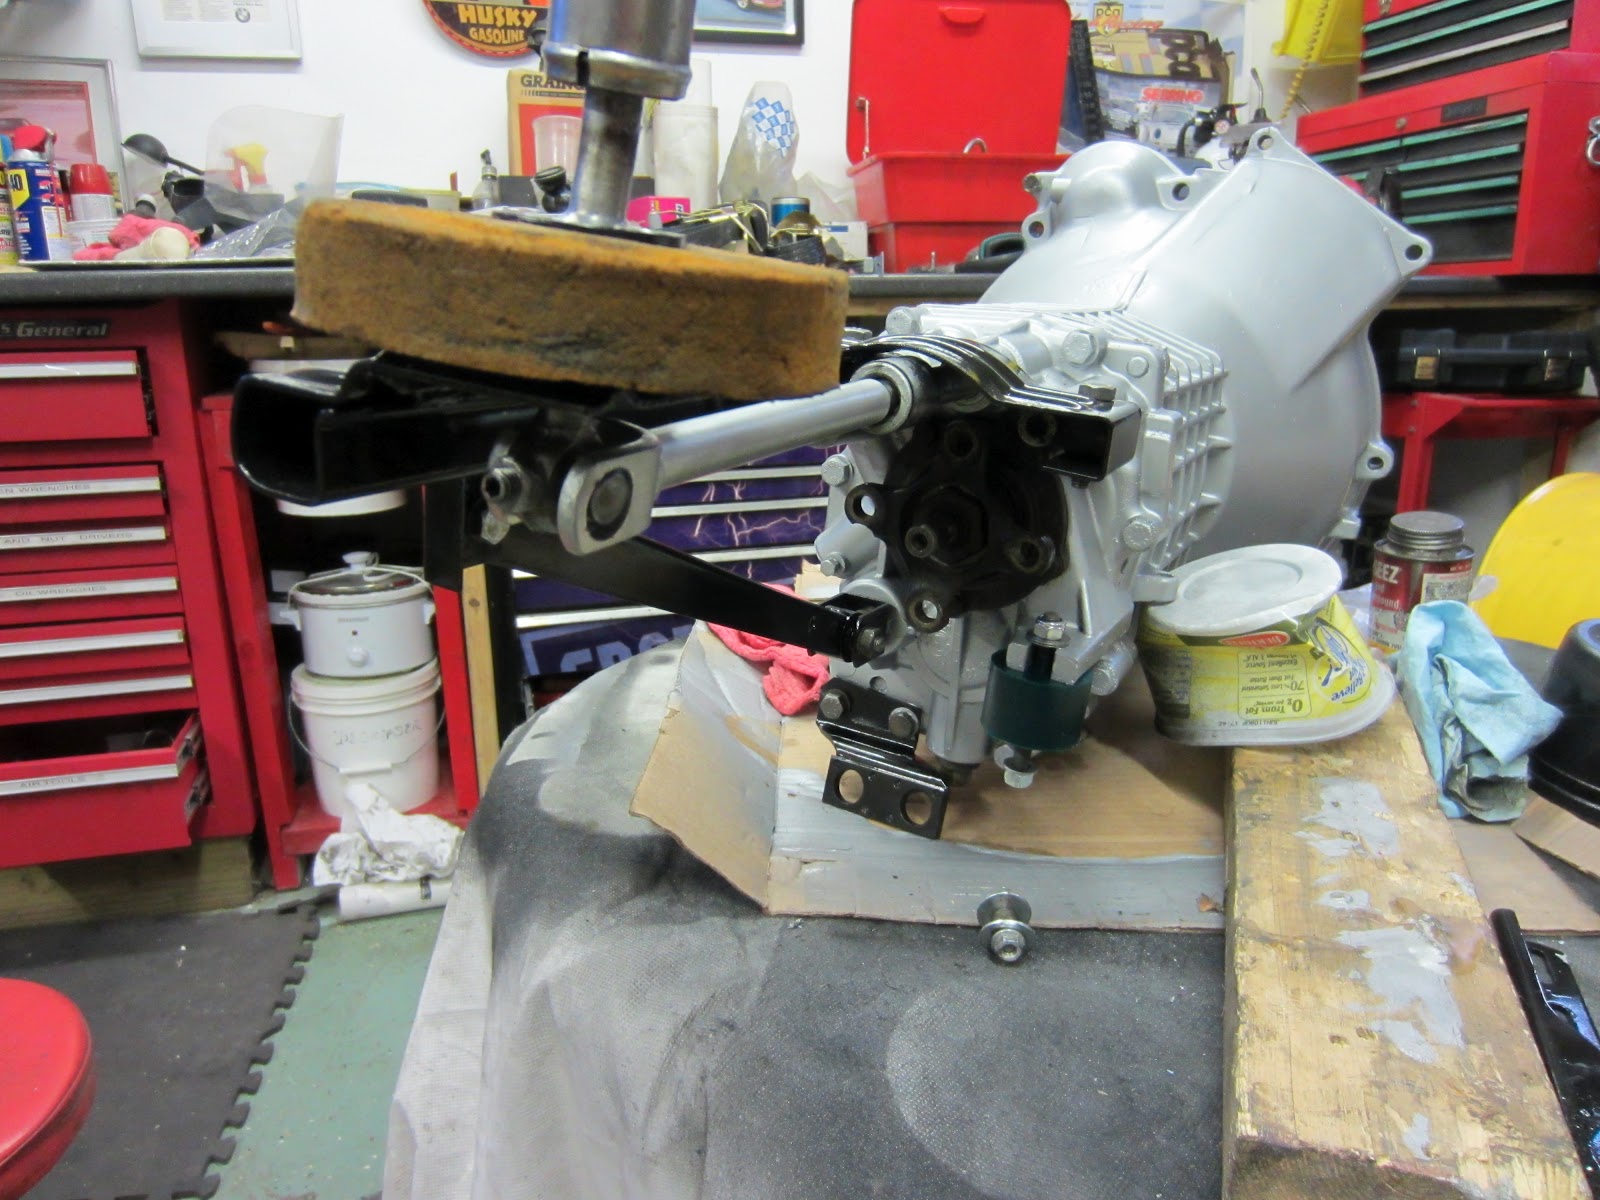
At the back of the tranny is a structure that supports the shifter mechanism. Replacing those pieces is not an option. See that support rod  angling from the bottom? That's 70 bucks. That's silly money for that. It's just a bit rusty. Nothing a few hours in the shop can't fix.


A close-up of the shifter structure


Time to unbolt it and clean it up. This is the part where braincells start to drift away.

All the various pieces get taken down to the bare metal - usually with my wire brush in my power drill, prepped, primed and shot with a paint bomb. Some very volatile and nasty solvents in that stuff. If I forget my respirator I'll soon be working the counter at Mcdonalds, not writing code.


Top piece being worked


When the tranny is back together again I show the final results.

Spent more time on the engine block, more cleaning, though it doesn't really show it. All the bits, like the intake, water pump and webers are off. I'm out of plastigage, so until that shows up I won't do the rod bearings. I did clean and paint a lot of the little bits like the intake and cooling system.


I did paint the oil pan, so at least part of the engine looks nice.


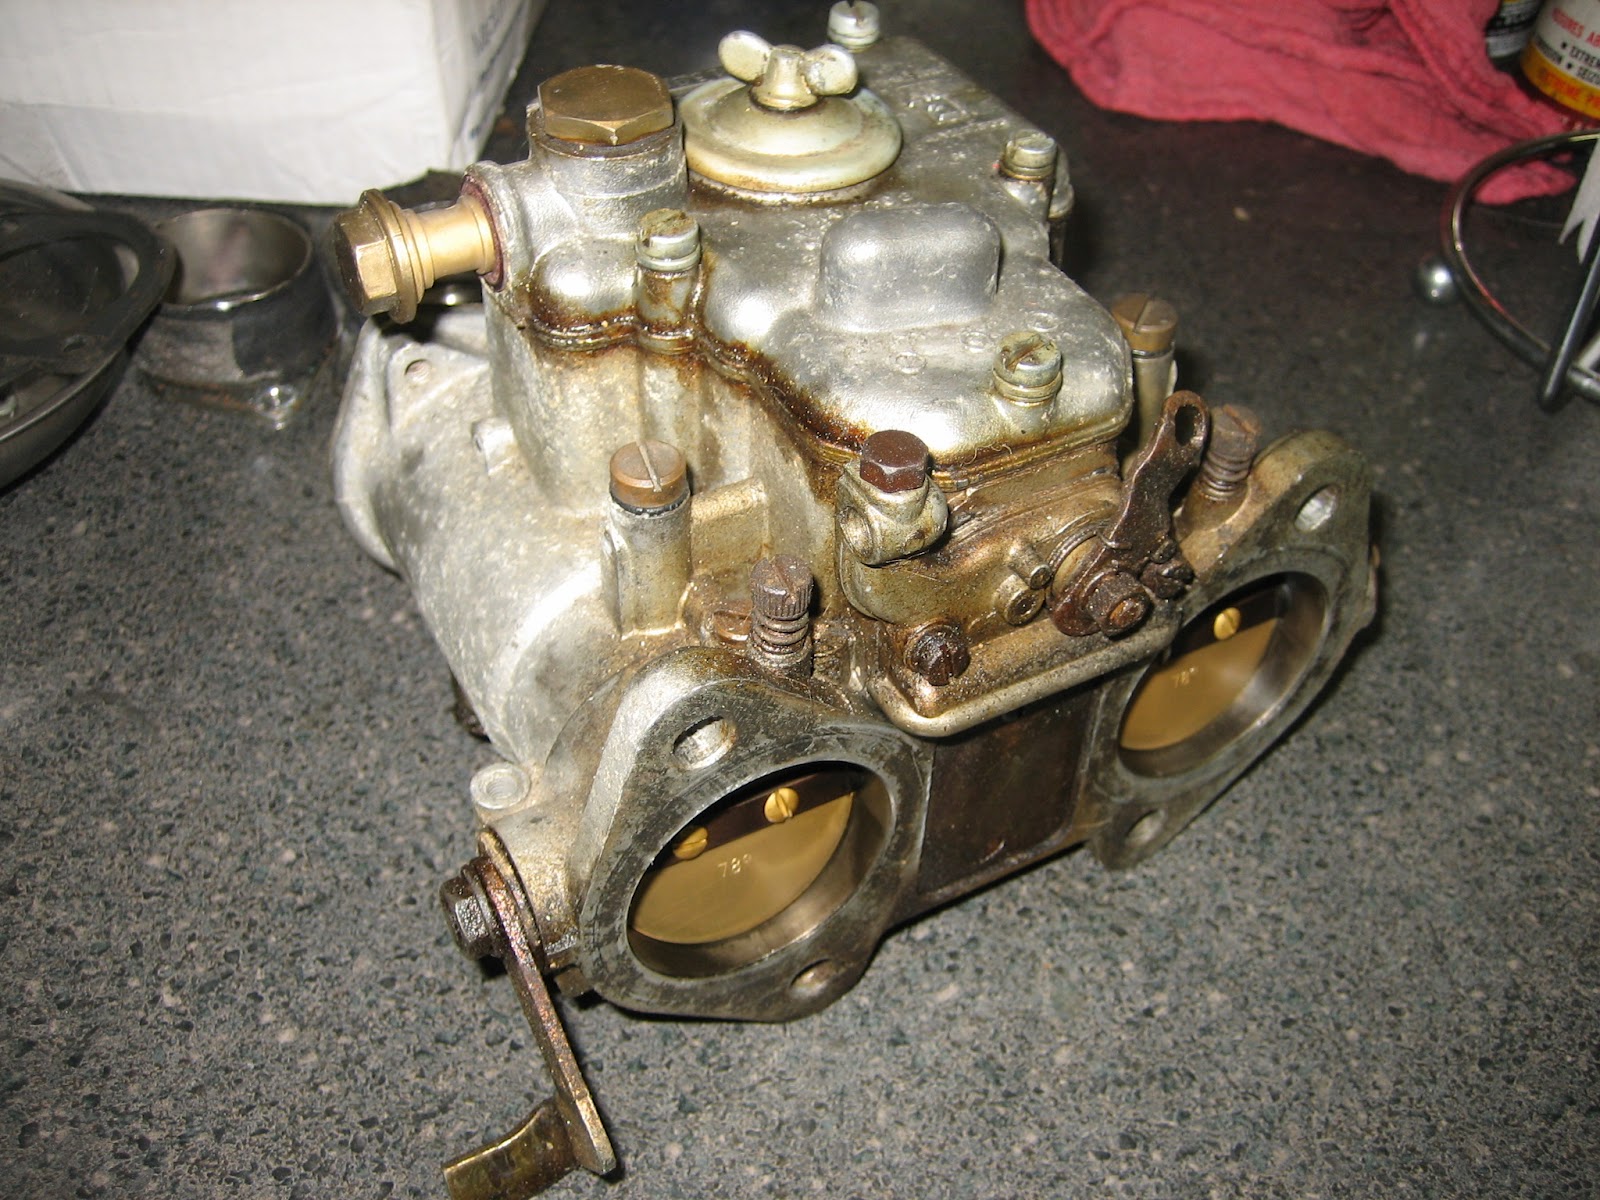
Sunday afternoon was spent working on the Webers. My motor has dual DCOE 45's. At first glance they don't look that bad...


Up close, the story changes. You need to click on the pictures to see the true condition. These little pictures make them look better than they are.


I borrowed a soda blaster from my buddy Edward and had at it for a couple of hours in the driveway. Man it was cold out there in January. But the results were worth it. Here's a picture of one done, and one original.


After another hour, here's both.


T'aint perfect, but it will do. And other than being covered head to foot in a fine white powder, I hardly lost any brain cells doing it. A win-win! Now where was I? Whose house is this? Where did I put my car keys? ...

Wednesday, February 1, 2012

Vintage Parts

I have to give BMW credit where it's due. While I think they have lost their way with their current cars, trying to be everything to everybody, one thing they have done well is support for their older aka vintage models like the 2002.  I heard that over 90% of the parts for the '02's are still available from them through their BMW Mobile Tradition services. They built a "new" 1973 2002 tii from mostly off the shelf parts just a few years back. Pretty impressive.

Here's a great example. Since I'm having the engine compartment repainted, I want it to look nice. The firewall has a foam pad for insulating the passenger compartment from heat and noise. My pad, while still intact, is 40 years old, and looks it. Dirty, greasy and getting close to that state when the foam will start crumbling. But with a couple of clicks of the mouse, and a shout-out to my main sponsor MasterCard, I have a brand new, still in the bag, firewall pad. How cool is that?

OEM baby, all the way


I've also been stashing some other little goodies for down the road.

Like a pair of original, NOS (New Old Stock) Talbot Green-dot black mirrors. I scored these on Ebay Germany.

Not BMW stock, but an 70's high end upgrade.


And a set of NOS CIBIE driving lights. I'm undecided on whether or not to make the lens yellow. Time will tell.

These with my H4's should throw down some serious light.


Tuesday, January 31, 2012

At the Paint Shop

I sneaked over to the paint shop Monday evening to check out the progress on the bimmer. They were about to close and Charlie Jr. wasn't around so I only had time to grab a few pictures and didn't chat with anybody.


They haven't gotten to the hood yet.


Passenger side

Trunk spoiler was glued down and didn't come off willingly.

Driver's door needed more repair than we thought. Whole bottom panel was replaced.

My (Premature) Obiturary

Lots of news organizations maintain pre-written obits so that when a celebrity passes, they open up the file and need to just update a few l...